Signature Collection Traditional Christmas Card Tutorial
- Read time: 2 minutes
- Written by: Crafters Companion
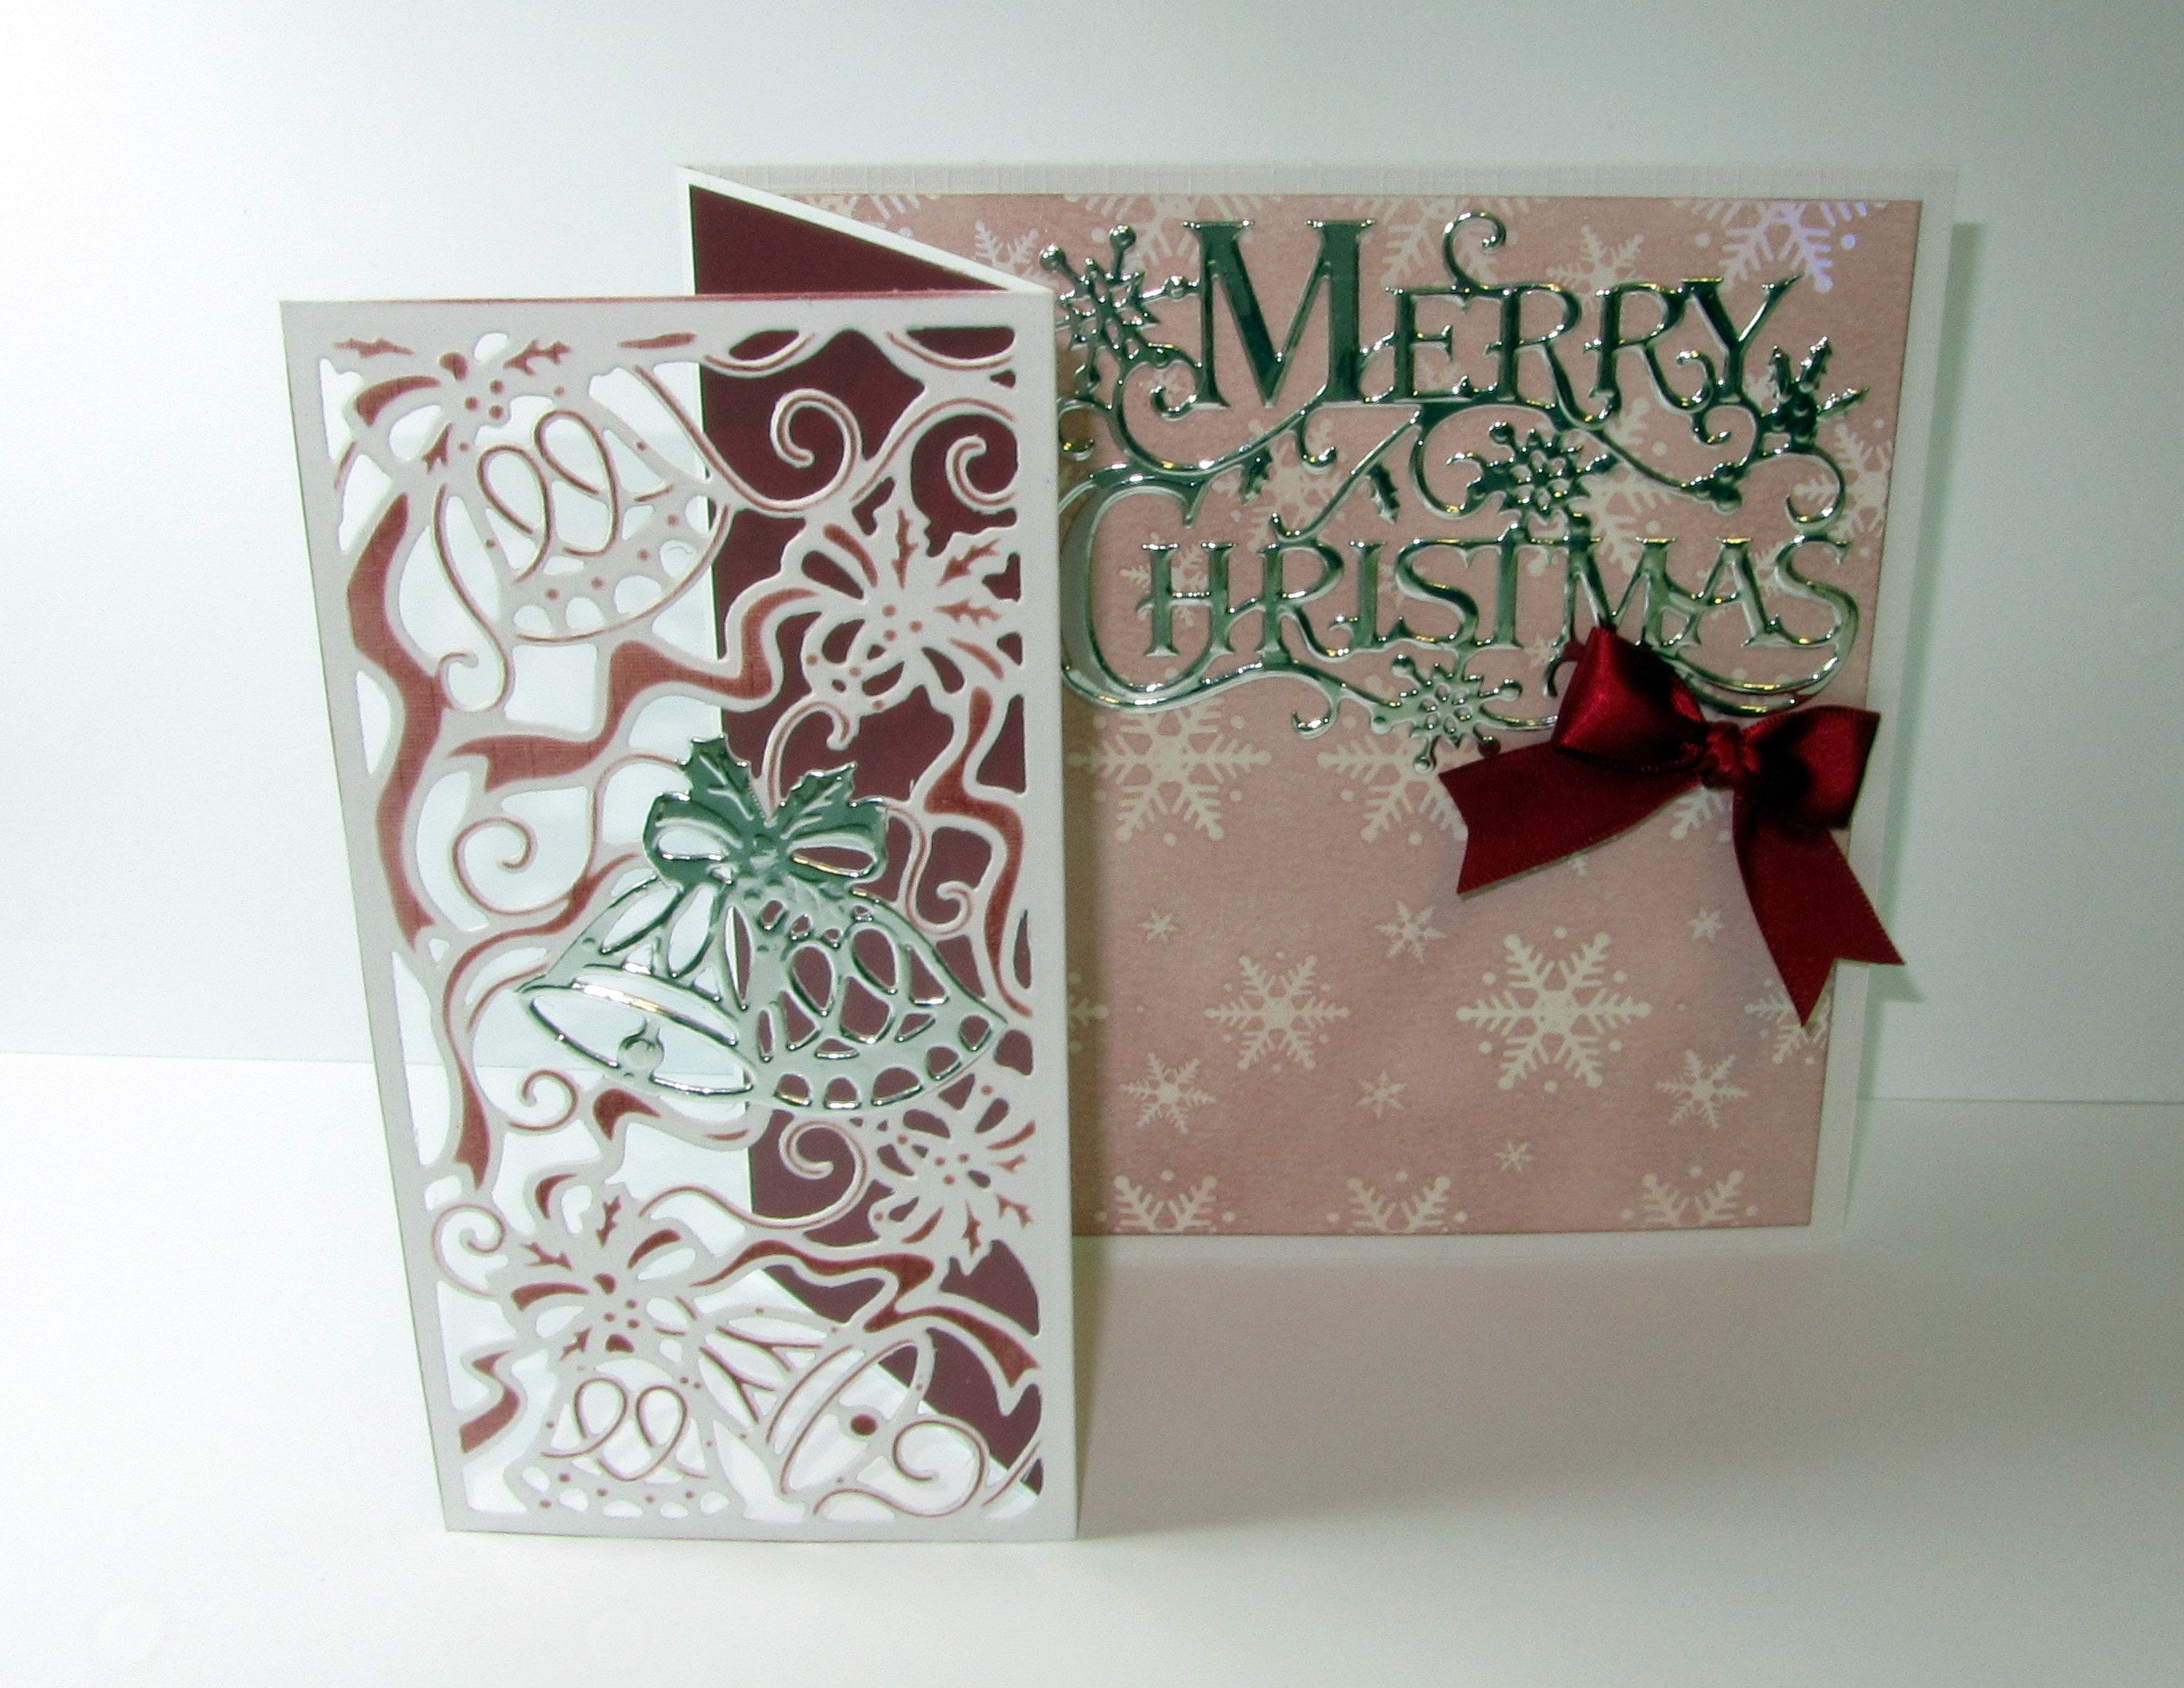
I’ve been getting so many fantastic comments from you about my new collection I thought I’d show you a fab card idea using the new Christmas Bells and Festive Greetings die that I just demonstrated on my 12pm show!I hope you’ve been enjoying my tutorials…I love making step by step blogs for you guys and seeing what you create! I love to get even more inspiration from you guys…so keep them coming!
Materials used from my new range:
Sara’s Traditional Christmas – Christmas Bells die, Festive Greetings die
Other materials used:


To Create
1. Half fold the front of an A6 card blank. Next, place Christmas bells die onto the inside left hand panel, so when folded back, creates a gatefold card. While die is still attached to card, transfer distress ink aged mahogany through the die. I have to admint – the Gemini has been a life saver when doing my TV Show samples…the new dies are so detailed only the gemini would have cut them all in the short space of time I had!
2. Trim resist card from luxury paper pad to 5 1/2″ square, then transfer distress ink all over the image, buff with a dry cloth, then affix to the inside of the card.
3. Trim red card 5 1/2″ x 2 3/4″ then affix to the right side of card front….I used some card I found in my craft room but you could use any design or colour for yours!
4. Trim a small piece of silver mirri card from my Signature Collection, then place over the bells on the Christmas bells die, die-cut, then snip the bells out using small scissors. Apply stick it to the back of silver mirri card, the die-cut sentiment.
5. Affix Sentiment and bells onto card, tie a bow using the red ribbon, then affix to card to finish.
I loved doing this card…..there are so many ways to use the new dies and sentiments…I could have gone on for hours!
Happy Crafting! Love Sara xxx


